|
PGSuper
3.0
Precast-prestressed Girder Bridges
|
|
PGSuper
3.0
Precast-prestressed Girder Bridges
|
At this stage of the project there are several unknown girder parameters, such as number of prestressing strands and concrete strength. It is your job to figure them out and PGSuper will help you. You need to determine the number of strands, strand configuration, release strength of the girder concrete, and the 28-day strength of the girder concrete. You will also need to determine the location of lifting devices and support location for transportation to ensure the girder is not overstressed and is stable during handling and transportation. PGSuper has a design feature that will determine these parameters. In this section of the tutorial, you will learn how to design a girder using PGSuper's automated design feature.
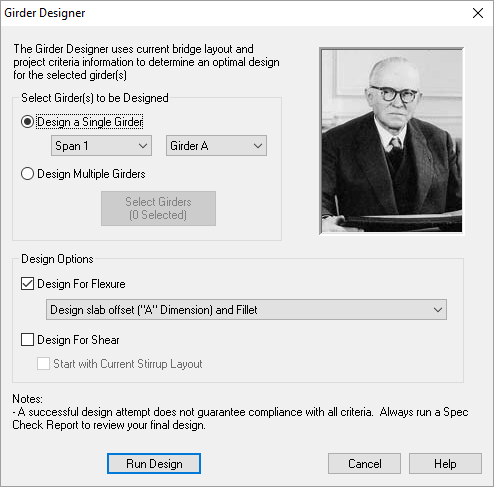
TIP: You can quickly design a girder by right clicking on it in the Bridge Model View and selected Design Girder from the context menu
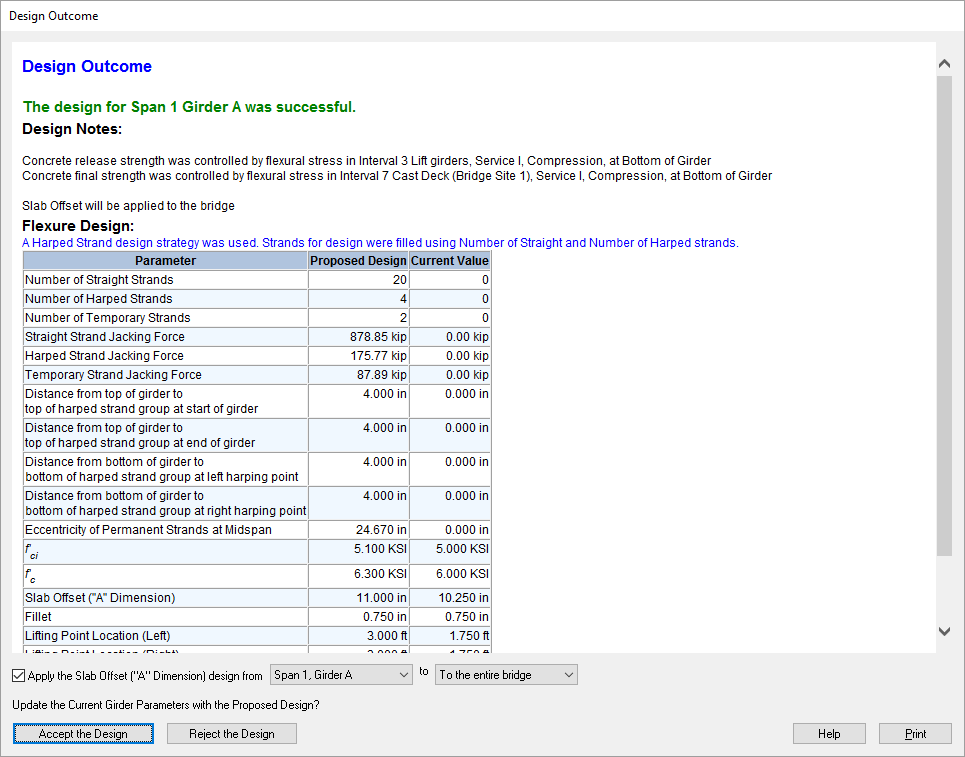
The Girder Designer considers only a subset of the criteria that typically controls a design. You should always consider the design as a starting point rather than a final solution. The next step is to perform a full specification check on the girder. To do this, you will create a Specification Check Report.
Reports are created by selecting a report from the list of available reports. We want the Spec Check Report.
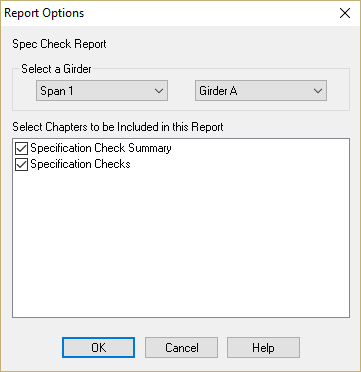
TIP: You can quickly create a report by right clicking on the desired girder in the Bridge Model View and selecting the report title from the context menu
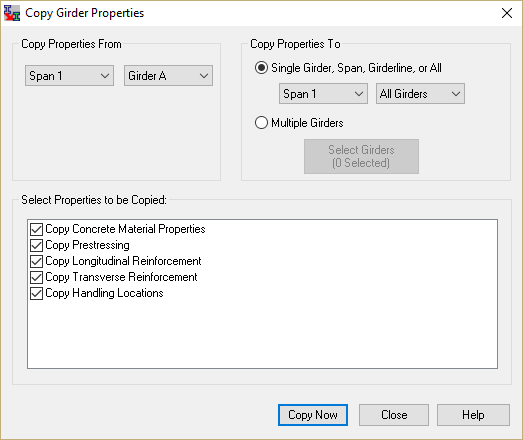
After reviewing the report, you will find that PGSuper made a pretty good guess. Since all the other girders are the same, let's copy the parameters from Girder A to all the other girders.
Select Project > Copy Girder Properties... This will bring up the Copy Girder Properties window. Select Span 1 Girder A from the left hand column. This is the girder you will be copying from. Select Span 1 All Girders in the right hand column. The properties from Girder A will be copied to these girders. We want to copy all the properties so make sure all the boxes are checked. Press [Copy Now] to copy the properties.
TIP: Always view report results for all unique girders in the bridge. You should always review at least one exterior and one interior girder.
TIP: See Design in the User Guide for information on PGSuper's Automated design capabilities.
TIP: See Girder Modeling in the User Guide for information on girder editing.
 1.8.11